How to look for different/unusual view points

A photograph looks different when it is shot from an unusual point of view. An unusual point of view is a view that many photographers would not have tried. May be it is something very contemporary or unconventional. A conventional photograph is one that is normally shot from a comfortable zone. When we try to jump out of a common path the photo automatically becomes different. The unusual point of view creates an extra attention to the photo.

The following tips may help you to shoot something unusual.

  1. Come out of the tourist instinct and avoid seeing things from a gallery point of view or a tourist guide’s point of view.

turban

  1. Go around the subject if possible or visualize the other sides of the subject.

temple

  1. Step out of the common path…and refrain from shooting along with most other persons with a camera.

Kapaleeshwarar temple

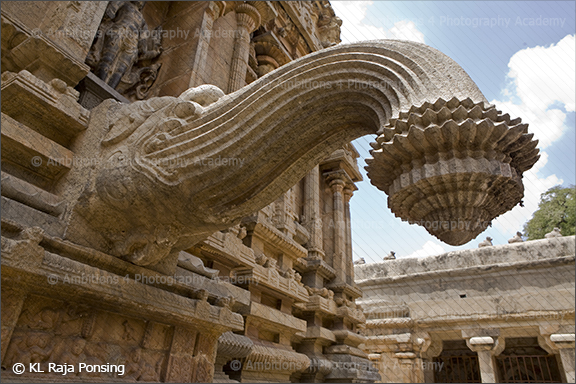
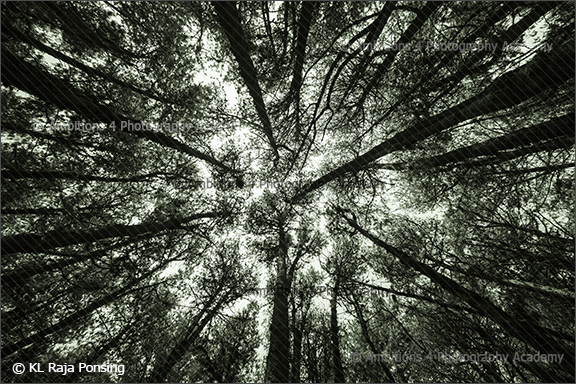
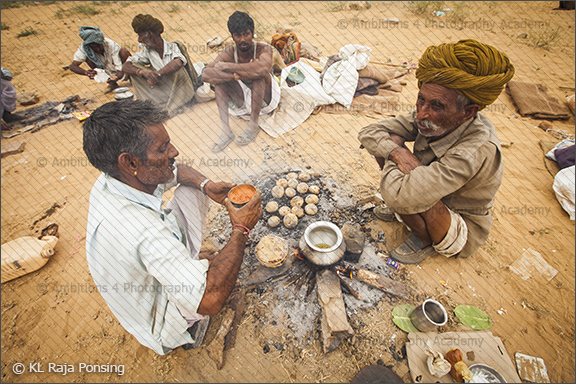
  1. Avoid eyelevel point of view as far as possible. Look at the subject little from a low level or climb up little elevations.

forest

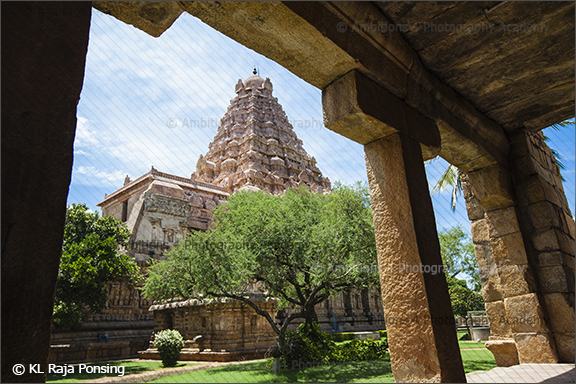
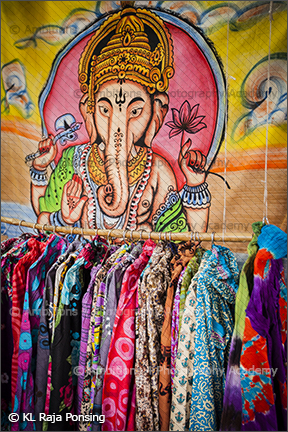
  1. Include some interesting foreground… a suitable or meaningful foreground will make the point of view truly unusual.

Balaji Prasad (4)

  1. Shoot through arches, doorways, holes, fences, jolly etc. to make it interesting.

Hindu temple

  1. Look for interesting reflections in the foreground or background.

Church

  1. Shoot people from others point of view – an over the shoulder shot will be exciting and unusual.

ganesha

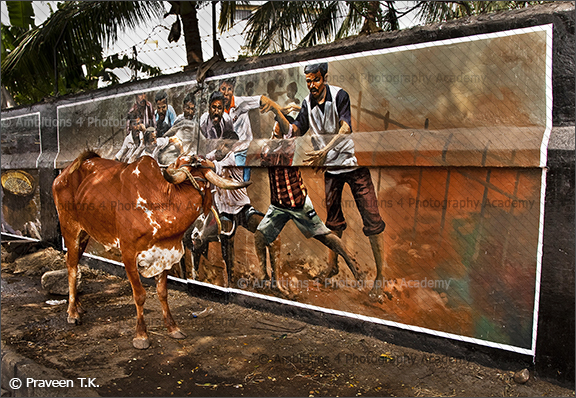
  1. Overlap the subject meaningfully on to a suitable background to make the subject unusual.

Jallikattu

  1. Use extra wide-angle lenses for unusual perspective distortions and visual effects.

Rajasthan

If you found this article useful, please check our Diploma in Professional Photography course , where we explore all the professional aspects of photography in detail. It is an intensive 6 months fulltime course 

How to make HDR images

HDR (High Dynamic Range) images are photos with better details in the extreme brightness areas. In other words, the details of highlights and shadows are fairly good despite of extreme variation in its brightness. Most of our cameras can only give an average details in the extreme bright areas. Unlike our eyes, the sensors of digital cameras are not capable of seeing and recording the extreme brightness in a scene.

In a practical scenario, DSLRs with larger image sensors (full frame DSLRs and medium format DSLRS) perform better than the cropped APS sensor cameras. Larger size pixels in these cameras are able to do retain the details of highlights and shadows.

HDR

On the other hand, we can perhaps shoot more than one exposure, say three shots or five shots or seven shots deviating little more and little less from the camera’s exposure. For example, if the camera’s exposure at ‘0’ is 1/125 f/11, we can also shoot an under exposed image at 1/250 f/11and an over exposed image at 1/60 f/11. In this sequence of three exposures, the first 1/125 f/11 will give the details of the mid tones, the second 1/250 f/11 will give a better high light details and the third 1/60 f/11 will give a better shadow details. Now all the three shots may be sandwiched together for an over all details in all the three tones in an image editing software. Most of the advanced DSLRs can also do this automatically as an in camera post production process.

A HDR shooting and processing is recommended for high contrast lighting scenes like landscapes, Sunsets and Sunrises, interior and exterior shots, shooting from inside to outside shots, night scenes and more.

For a professional HDR shot the following aspects may be considered,

  1. Choose to shoot non moving subjects (a compositing shot of the movement will show it as a ghost effect)
  1. Use a stable tripod for perfect composition and alignment of consecutive shots (three, five or seven.
  1. Use manual focus or auto focus lock to maintain the point of focus as the same in all the shots in the sequence.
  1. Work in aperture priority exposure mode and stay on the say aperture for all the shots. (This will maintain the depth of the field same in all the shots by changing the shutter speed only)
  1. Use manual selection of ISO (avoid Auto ISO because, the change in ISO in otherwise will result in change in noise level)
  1. Decide about the first exposure perfectly – may be some times you need to compensate the exposure. The subsequent exposure in the sequence will change from the first exposure.
  1. Decide the variation of exposure steps (1/3 or 1/2 or 1stops) based on the contrast of the scene.
  1. Decide the number of shots in a HDR based on the contrast of the scene – a seven shot variation will give a smooth transition compared to three shot variations.
  1. Use continuous frame shooting in the drive mode option.
  1. Image correction and editing may be done only on the final HDR image.

If you found this article useful, please check our Advanced Diploma in Professional Photography course , where we explore all the professional aspects of Commercial photography in detail. It is an intensive 12 months fulltime course