Wow… its food photography…!

soup

Food a most essential thing for all is something we see and taste on every day basis. We also see a lot of food pictures in advertisements, menu cards, websites, indoor displays etc.  But how many of us have really visualized as how the food is shot for commercial purposes?  Well, what is so special about shooting food as a table top set-up? It’s about showing food appetising and fresh in the photo.

orange-juice

Is that simple? It is not that simple as we think. We need to understand every single food with respect to its colour, texture, form, shape and arrange them aesthetically beautiful so that it catches the eyes. Well, can we shoot the food that is served to eat? Many times the answer is ‘No’. You cannot shoot the food that you eat and cannot eat the food that you shoot.

salad

Interestingly, many food set-ups contain uncooked or half cooked food or ingredients and dummies to make them look fresh and retain the colour, texture, form and shape. Most of food contents degenerate or undergo a lot amount of physical and chemical changes when cooked.

beverage

We all know that food has a strong cultural value and background. The presentation of food in front of the camera needs to carry the cultural feel. Well, you need to use the appropriate table top, background and the plates, cutlery, accomplishments, properties, garnishing, and arrangements to match the cultural value or background of the food. For example, while shooting a Chinese dish, we can include a pair of chopsticks…!

melon-balls

Choose to work with a competent food stylist and culinary artist. This will add a lot of value for food photography. In the recent Food Photography workshop conducted by me, I had got a perfect assistance from the Chef Uma Sankar, an Olympics bronze medallist in culinary art, assisted by Bindhu Hepzibah an artist. Uma Sankar’s contribution as a chef and culinary artist went a long way in making the food fresh and appetizing.

pasta

A professional high resolution digital camera with optically perfect lenses and studio lights could make the food photography complete. Choose to shoot food in the studio for a better control or create a setup near the kitchen of the restaurant. A lot of training on lighting and composition is required to get the shot right. Use of multiple, small, pointed light sources apart form an overall lighting from a soft box is needed to get the highlights in the desired portion of the food.

milk-and-cookies

Love food.., in the sense of feel and visual aspects. This is a most important eligibility to become a food photographer.

How to use shutter speed effectively in DSLR photography?

Shutter speed is the duration of light falling on the digital image sensor. It is the time for which light stays on the image sensor to make a perfect exposure. It is controlled by a mechanism housed in the camera body closer to the focal plane (image sensor).

The role of shutter speed in photography is very important and can produce interesting effects that human eye cannot see. The very meaning or understanding of a photo can be changed by varying the shutter speed.

Mohan S.V.jpg

Fast shutter speeds like 1/125, 1/250, 1/500, 1/1000 and above will let the exposure very brief and slow shutter speeds like 1/30, 1/15, 1/8 and below will let the exposure long.

Total flash photography needs a shutter speed 1/200 (flash sync speed) or below for most of the cameras. There is no impact of flash exposure by changing the shutter speeds when there is not enough ambient light.

Jerome Desilva (26)

Shutter speeds higher than the reciprocal of the focal length of the lens used will guarantee images without camera shake when a tripod is not used – A 400mm lens needs atleast 1/400 shutter speed and a 18mm lens needs just 1/20 shutter speed to avoid camera shake.

DSC_0161

Fast shutter speeds can assure crispy and sharp images without camera shake and apparent subject motion effects.

Madeep 2014 (2)c

Fast shutter speeds like 1/125, 1/250, 1/500, 1/1000 and above are used to arrest the fast motion – faster shutter speeds can capture fast actions we missed to see. Use highest possible shutter speeds for shooting sports, birds in flight, wild life action – shutter speed higher than 1/500 is a good choice.

SUB_0001c

Slow shutter speeds like 1/15,1/8,1/4 and bellow are used to record movements as a blur – some of these blurring effects  like panning and zoom burst are unique that human eyes cannot see .

Sendil Selvam (10)

Long exposures like 1sec, 2secs, 4secs, 8secs and longer can produce beautiful light streaks – something we cannot see with our eyes. Use of a tripod is a must for such shots.

_MG_9825c

Bulb shutter denoted by ‘B’ is a longer than the 30secs preset shutter speeds available, is something used for very low light shots, fire works, lightning, light painting and abstract images. Use of a tripod is a must for such shots.

Mandeep 2014 (1)

If you found this article usefull, please check our Basic DSLR Photography weekend course , where we explore all the essentials of Digital SLR photography in detail. It is an intensive, 10 weekend (60 hours) course 

How to create the feel of depth in the photos?

The feel of depth can be understood as the feel of walking through the photo. A photo is two-dimensional and the feel of three dimension is all about the feel of depth in it. An illusion of the third dimension is tried in all the photos to give the feel of reality. It is the added perspective mainly from the point of view. Our eyes can see in three dimension as the scene in front of us is not flat. The feel of variable distance of different objects in the frame is known as the feel of depth.

To establish the depth, the photo must contain multiple planes or layers in it. May be foreground middle ground and a background._MG_4178c

The following tips may give us a feel depth in our photos

  1. Use wide-angle lenses for a greater feel of variation of the object sizes in the frame and the feel of distance in it.IMG_9664c
  1. Avoid using very long focal length lenses as they compress the scene and make it look very flat without depth.
  1. Lookout for multiple planes or layers as seen from the point of view. Every distinct planes will give an additional feel of depth in the photo.IMG_0404c
  1. Include or add a foreground element in the scene to get a comparative distance from the main subject_MG_4723c
  2. Lookout for visually identifiable real or imaginary lines or curves running from the corner of the frame diagonally across. This will give an illusion of depth and distance.IMG_9490c
  1. Avoid flat front lighting and use sidelight with good shadows to define the planes and distance.
  1. Shoot from a diagonal angle to give the feel of diminishing perspective. This will give a feel of depth to the scene.   IMG_0242c
  1. Include repetitive and overlapping patterns to add the feel of depth
  1. Use shallow depth of field while shooting portraits and people shots. The out of focus background will give the feel of extra distance from the main subject._MG_0005c

If you found this article useful, please check our Diploma in Professional Photography course , where we explore all the professional aspects of photography in detail. It is an intensive 6 months fulltime course 

How to avoid camera blur on subject?

Camera shake or camera blur is a crucial problem while shooting in slow shutter speeds and it is a major issue with the beginners. It is the feel of visual jerk or vibration seen in a photo. A point and shoot instinct without understanding the effect of slow shutter speeds results in camera blur. The image looks unclear, without sharpness and the out line of the subject is not well-defined when there is a camera shake.

This is a big challenge if you are a nature/wild life/sports/macro photographer using long focal length lenses. Lenses with built-in tripod collars (70-200mm, 100-400mm) are supposed to be used on a tripod especially you are shooting in the available light.

The following tips will help us get rid of unwanted camera shake resulting in blurry pictures.

IMG_0238r

  1. Use faster shutter speeds possible in a given situation.
  2. Try increasing the ISO sensitivity or larger apertures instead of reducing the shutter speeds in low light conditions when you are not using a tripod.
  3. Choose a shutter speed higher than the reciprocal of focal length of the lens while shooting the camera hand-held. For example, use 1/60 while shooting at 50mm and 1/125 while shooting at 105mm. This does not matter when your camera is on a solid tripod.
  4. Use fast lenses (lenses with wider maximum apertures viz.f/2.8,f/1.4,f/1.2 etc.). Fast lenses will give you scopes to use fast shutter speeds.
  5. Activate IS or VR image stabilization technology of your camera/lens for shooting below the reciprocal principle as mentioned in point 3. This may let you shoot at least two stops lower than the reciprocal principle._MG_0026r
  6. Use sturdy tripods to hold on the weight of your camera plus lens and other accessories perfectly and confirm the camera is not shaking during the exposure.
  7. If you do not have a sturdy tripod, you can try holding the camera firmly by leaning on to a stable support or you can even use a sand bag and set your camera on it.
  8. For very slow shutter speeds and long exposures do not press the shutter release directly with your fingers; instead use the remote shutter release or self timer release.
  9. When shooting in live view mode (both still images and video) hand-held camera operations, use the camera strap on your neck and stretch in front tight to hold the camera steady.
  10. Check your image at 100% magnification level to identify the camera shake. The LCD on the back of your camera cannot give you a clue about camera blur in its normal display.

IMG_0261r

If you found this article useful, please check our Basic DSLR Photography weekend course , where we explore all the essentials of Digital SLR photography in detail. It is an intensive, 10 weekend (60 hours) course. 

How to take advantage of shapes?

Shape is the first visual information human eye can take to understand a subject. From our childhood, we learn a lot from shapes. A recognizable shape is what makes us relate things subconsciously.

What is shape in photography? Shape is a definite distinctive form, something which is distinguished from its surrounding by its out line. It is two dimensional element of basic picture composition in photography. It usually helps us to identify the object.
Seafood
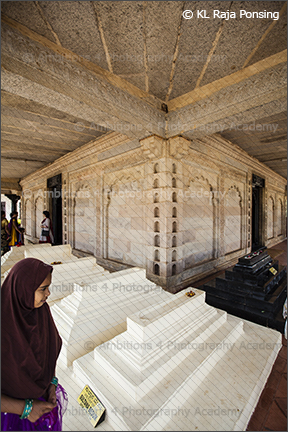
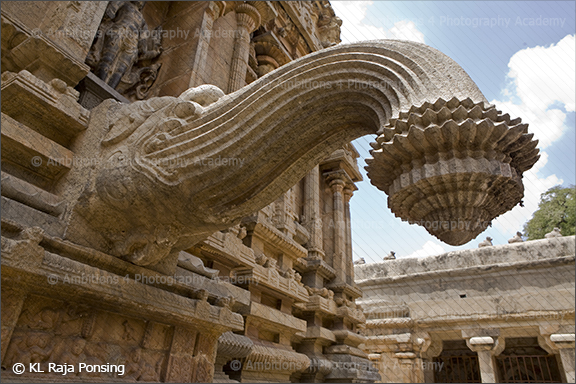
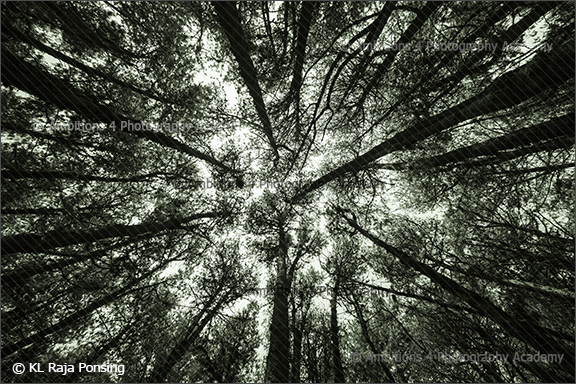
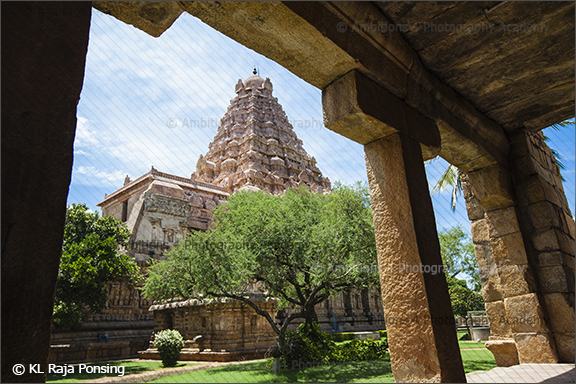
This out line of the subject changes when we change the point of view.  That is, when we move to different point of view the shape of the subject changes quickly. Some times this out line is not defined well and hence we cannot understand the subject. To define a subject, we must get an identifiable shape from an appropriate angle. We need to move around to see as how the shape of a subject is changing and how relevant is the point of view chosen.

To get the best of the shape in any subject the following tips may be tried

  1. Move around the subject to find a recognizable or attractive shape
  1. Choose a relatively clear background without clutter and confusion
    bottle
  1. Find a contrasting colours or tones in the background to make the subject stand out in shape.
  1. Overlapping patterns or objects must be avoided to get the advantage of shape.
  1. Make the background out of focus to separate the subject shape clearly – use shallow depth of field controls.
    Pushkar Camel Fair - Rajasthan
  1. A strong rim light or back light all around the subject can pronounce the shapes more powerfully than a flat front light.
  1. The shapes without colour, texture and details are very interesting. They are called, ‘silhouettes’ in photography. Silhouettes are very powerful and aesthetic means of shape.
    dancer in mahabalipuram
  1. Avoiding the camouflaging background will improve the feel of the shape.
  1. A side angle or a total profile shot will be ideal for identifying birds and animals distinctively.
  1. The identifiable shapes in the architecture makes the photos very strong in terms of its beauty and understanding.
    necklace.jpg
    for more information write to admin.ambitions4@gmail.com. Don’t forget to follow us on Facebook and Twitter for the latest updates!

How to look for different/unusual view points

A photograph looks different when it is shot from an unusual point of view. An unusual point of view is a view that many photographers would not have tried. May be it is something very contemporary or unconventional. A conventional photograph is one that is normally shot from a comfortable zone. When we try to jump out of a common path the photo automatically becomes different. The unusual point of view creates an extra attention to the photo.

The following tips may help you to shoot something unusual.

  1. Come out of the tourist instinct and avoid seeing things from a gallery point of view or a tourist guide’s point of view.

turban

  1. Go around the subject if possible or visualize the other sides of the subject.

temple

  1. Step out of the common path…and refrain from shooting along with most other persons with a camera.

Kapaleeshwarar temple

  1. Avoid eyelevel point of view as far as possible. Look at the subject little from a low level or climb up little elevations.

forest

  1. Include some interesting foreground… a suitable or meaningful foreground will make the point of view truly unusual.

Balaji Prasad (4)

  1. Shoot through arches, doorways, holes, fences, jolly etc. to make it interesting.

Hindu temple

  1. Look for interesting reflections in the foreground or background.

Church

  1. Shoot people from others point of view – an over the shoulder shot will be exciting and unusual.

ganesha

  1. Overlap the subject meaningfully on to a suitable background to make the subject unusual.

Jallikattu

  1. Use extra wide-angle lenses for unusual perspective distortions and visual effects.

Rajasthan

If you found this article useful, please check our Diploma in Professional Photography course , where we explore all the professional aspects of photography in detail. It is an intensive 6 months fulltime course 

How to make HDR images

HDR (High Dynamic Range) images are photos with better details in the extreme brightness areas. In other words, the details of highlights and shadows are fairly good despite of extreme variation in its brightness. Most of our cameras can only give an average details in the extreme bright areas. Unlike our eyes, the sensors of digital cameras are not capable of seeing and recording the extreme brightness in a scene.

In a practical scenario, DSLRs with larger image sensors (full frame DSLRs and medium format DSLRS) perform better than the cropped APS sensor cameras. Larger size pixels in these cameras are able to do retain the details of highlights and shadows.

HDR

On the other hand, we can perhaps shoot more than one exposure, say three shots or five shots or seven shots deviating little more and little less from the camera’s exposure. For example, if the camera’s exposure at ‘0’ is 1/125 f/11, we can also shoot an under exposed image at 1/250 f/11and an over exposed image at 1/60 f/11. In this sequence of three exposures, the first 1/125 f/11 will give the details of the mid tones, the second 1/250 f/11 will give a better high light details and the third 1/60 f/11 will give a better shadow details. Now all the three shots may be sandwiched together for an over all details in all the three tones in an image editing software. Most of the advanced DSLRs can also do this automatically as an in camera post production process.

A HDR shooting and processing is recommended for high contrast lighting scenes like landscapes, Sunsets and Sunrises, interior and exterior shots, shooting from inside to outside shots, night scenes and more.

For a professional HDR shot the following aspects may be considered,

  1. Choose to shoot non moving subjects (a compositing shot of the movement will show it as a ghost effect)
  1. Use a stable tripod for perfect composition and alignment of consecutive shots (three, five or seven.
  1. Use manual focus or auto focus lock to maintain the point of focus as the same in all the shots in the sequence.
  1. Work in aperture priority exposure mode and stay on the say aperture for all the shots. (This will maintain the depth of the field same in all the shots by changing the shutter speed only)
  1. Use manual selection of ISO (avoid Auto ISO because, the change in ISO in otherwise will result in change in noise level)
  1. Decide about the first exposure perfectly – may be some times you need to compensate the exposure. The subsequent exposure in the sequence will change from the first exposure.
  1. Decide the variation of exposure steps (1/3 or 1/2 or 1stops) based on the contrast of the scene.
  1. Decide the number of shots in a HDR based on the contrast of the scene – a seven shot variation will give a smooth transition compared to three shot variations.
  1. Use continuous frame shooting in the drive mode option.
  1. Image correction and editing may be done only on the final HDR image.

If you found this article useful, please check our Advanced Diploma in Professional Photography course , where we explore all the professional aspects of Commercial photography in detail. It is an intensive 12 months fulltime course 


My 136th photography workshop to remember…!

honoring the mentor

Receiving a momento from the members of the Thirupur District Video &Photographers Association

It was an enchanting experience to share some of my views about ‘Candid wedding photography, (an artificially stimulated business trend in current wedding photography market) with professional wedding photographers of Tirupur District Video and Photographers Association. I had shown more than 250 artistic wedding images to explain about candid shots.

interactive session

Interactive session

Thirupur photography workshop

All about contemporary wedding photography

The event had lots of highlights as,

  1. How to see and visualize a candid shot?
  2. How to make the candid shots meaning full & story telling?
  3. How to use the professional studio flashes in the wedding events?
  4. How to use the professional portable camera mounted flashes?
  5. How to use the available lights and video lights as sources?
  6. How to mix the above lights in a wedding/event scenario?
  7. How to use Elinchrom Ranger flashes for outdoor couple portraits?
  8. How to use monopods in wedding shoots for lowlight photography/top angle/low angle photography?
  9. How to control depth of field effectively to tell stories through photos?
  10. How to use fast prime lenses like, 50mm f/1.4, 85mm f/1.2 and zoom lenses 16-35mm f/2.8, 70-200mm f/2.8 lenses for shooting candid shots?
  11. How to motivate the couple in a pre/post wedding shots?
  12. More than 90 fully charged photographers participated the event with core interest in my delivery
  13. The event was so lively and entertaining for me and the participants
couple portrait demo

Outdoor couple portrait demo

couple portrait demo shot

At the end of the Workshop participants understood that,

  1. Candid photography is not just about shooting close-ups with a long lens
  2. There is no specific equipment for candid shots, for candid shots can be done with all lenses and cameras
  3. Candid photography by it self is not a ‘separate branch’ of wedding photography but a ‘style of working’, which is also practiced in all other branches of photography
practice session (2)

Indoor couple portraits demo session

a few pictures shot during the demo practical session…

The learning out comes of the workshop are,

  1. The participated photographers developed better confidence in shooting candid shots in weddings
  2. They came out of the myth that only certain camera models and lenses can give candid pictures
  3. They are convinced that there is no need for separate candid photographers in a wedding, because all the wedding shots need to be approached in the candid style.
  4. They also realized that they won’t be able to make a complete wedding photo book just with candid and couple shots alone.
certificate distribution

Awarding Certificates to the participants

Thirupur workshop by KL Raja

Mr. KL Raja Ponsing – photography mentor, founder and director of Ambitions 4 Photography Academy with the members of the Thirupur District Video &Photographers Association during the two days Candid Wedding Photography workshop @ Thirupur on 1st July 2015

Photography Tip

  • The camera can be wrapped in a soft cloth and stored in a dry place with plenty of air circulation.
  • A few sachets of silica gel can be added alongside if stored in a cupboard/ camera bag.
  • Avoid storing camera within closed quarters for prolonged periods of time.
  • Always store the camera in a clean and well ventilated place.
  • High humidity can promote fungi growth within the camera that might affect the quality of pictures.

How to shoot highly reflective products in the studio?

Highly reflective products will reflect almost everything in the studio. Jewels, watches, industrial products, automobiles are some of the reflective products which need a very special treatment. The reflections are something that need not be removed completely but handled in such a way it looks natural and does not distract the sheen, shape, colour and contours. There is a great challenge in getting them right in our shots.  engine parts

  1. As a ground rule, we can try using a soft, indirect lighting so that the reflections are looking natural and reveals the contours and texture perfectly.
  2. Use of a commercially available light tent can be a good choice for shooting large numbers of small products for catalogues and on line sales. For artistic shots, the light tent must be avoided because the light tent makes the whole product look flat without the feel of 3D.gold jhumkis
  3. The lights should not be aimed directly at the subject, but bounced from a matt white reflecting surface or diffused through gateway translucent sheets or white acrylic boards. The reflected/diffused light from these gadgets will prevent hot spots or specular high lights on the subject.
  4. Black cards may be used on the sides of the product to define the shape with clear dark outlines.jaguar car
  5. Use of black cards will add the feel of darkness in certain areas of the subject to make it look more three dimensional. We need to experiment with lighting, reflectors, black cards and the composition.
  6. A white background will make the job relatively easier to show the details of the reflective surface of the subject.Ornaments
  7. A dark/textured background can give a dramatic feel of the product with a variable light on it.
  8. The product needs to be cleaned thoroughly without visible scratches & spots otherwise it will show off the dirt and scratches most perfectly. The finger prints are apparently seen (better use a soft cotton hand gloves while handling the product) when the surface is not clean.watch
  9. A continuous light is sometimes preferred to the studio flashes. This is because the light fall from highlights to shadows is gradual. We can even use the tungsten light (modelling lamp) of the studio flash.
  10. A tungsten white balance or 2500 Kelvin will be suitable. Let the camera be on a steady tripod and use mirror up and remote shooting options while trying long exposures.gold bangle
  11. More than everything the arrangement of the product in front of the camera and an aesthetic composition is very important to get the shots attractive.
  12. In the process of getting rid of the reflections, the charm of shine and glitter of the highly reflective products should not be sacrificed. Remember these products stand and sell for its reflective nature!Perfume

If you found this article usefull, please check our Advanced Diploma in Professional Photography course , where we explore all the professional aspects of Commercial photography in detail. It is an intensive 12 months fulltime course